|
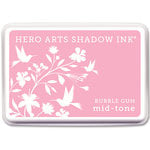
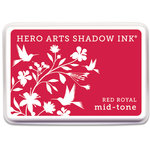
To start off on this card, I had to use Altenew's Bold Blossom stamp set and coordinating dies. Coordinating dies really do make light work of fussy cutting for masking or in this case, just cutting the images out. First, I die cut flowers and leaves from a piece of Neenah Solar White 80lb cardstock. I then used the leftover negative space to line up my stamps on my MISTI. I love the layered stamp look because the stamped end result is so realistic. For the roses, I stamped the layers using Hero Arts Shadow Ink in: Soft Pink, Bubble Gum Pink, Strawberry and Royal Red. The leaves were stamped with: Momento Pear Tart, Distress Ink Crushed Olive and Momento Bamboo Leaves. I like when my leaves have more of an olive tone to them and these came out looking like variegated leaves which give much more interest.
 Clear heat embossed Hero Arts Woodgrain background stamp highlighted with Distress Inks. Clear heat embossed Hero Arts Woodgrain background stamp highlighted with Distress Inks.
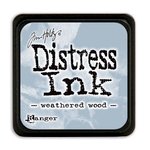
For the background, I have two options. One of the options was inspired from the most recent Camp Craft from My Favorite Things. Using Hero Arts wood grain stamp, I embossed the image on a piece of 80lb Neenah Solar White paper using VersaMark Ink and Hero Arts Clear Embossing Powder. I then used Distress Inks in Black Soot, Hickory Smoke, Weathered Wood and Pumice Stone with a light hand to add color and enhance the background. The result is a cool white washed wood grain that provides a great backdrop to pop the pink, red and green colors of the floral images. The other background option uses the same embossed wood grain details without inking the background with Distress Inks.
 Label Dies can be enhanced with embossing powder and some Distress Ink. The VersaMarker has the same formula as VersaMark just in convenient pen form so I can add VersaMark just where I need it. Label Dies can be enhanced with embossing powder and some Distress Ink. The VersaMarker has the same formula as VersaMark just in convenient pen form so I can add VersaMark just where I need it.
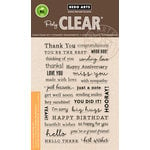
To pull this card together, I added a banner cut from Cricut Labels & Such die set. This set has a bunch of different labels that both cut and emboss the paper. I used the oval scallop and cut it from Neenah Solar White 80lb card stock. I then used a VersaMarker to add some sticky glue around the edge. Having the sticky edge allowed me to add WOW Gold Embossing powder which when I heat set it, gave the die cut added shine and texture. I then used Distress Ink in Tumbled Glass and used my Mini Ink Blending Tool to gently add some blue color to the background. The result was a beautiful die cut that added focus to my rose and made it look like it belonged and not just floating in the middle of the card for no reason. I also cut out a banner with another die from the Cricut Labels & Such and heat embossed "just because" and "miss you" from Hero Arts Many Everyday Sentiments and inked it with Tumbled Glass Distress Ink.
Upon assembly of the card, I first taped the scallop oval die cut to the woodgrain background. I then foam mounted the rose and added the leaves. I then attached the "just because" or "miss you" sentiment banner on the bottom. Deciding the gray background card needed another layer, I took a piece of scrap white paper and used VersaMark into to ink around the edges. I then poured WOW gold embossing powder all along the edges and heat set it. I then added this gold embossed layer to the front of an A2 sized Hero Arts red note card and my woodgrain panel on top. I added some Tonic Nuvo Crystal Drops in Duck Egg Blue in groups of three around the card.
Thank you for visiting my blog today. I hope this card inspires you to create your own cards and send them to friends. I've added links to the products I've used to make the cards. Some of these links are affiliate links which means I may get a portion of the sale if you choose to use them. Thank you for your support and happy crafting!
Comments are closed.
|
AuthorWelcome to Seven's Crafts and thank you for stopping by. I am a mom, teacher and avid paper crafter. I hope these posts will leave you feeling inspired and ready to do some crafting. Archives
November 2021
Categories
All
|









 RSS Feed